Style2

Style3[OneLeft]

Style3[OneRight]

Style4

Style5[ImagesOnly]

Style6

How to Get Rid of Yellow Teeth

Yellow teeth are invariably caused by stain-causing habits like taking tea, coffee, chocolates, carbonated drinks, wine, etc.

Furthermore, it is widely known that smoking cigarettes and chewing tobacco products leads to staining and discoloration of teeth.

In addition, factors like poor dental hygiene, excessive fluoride, dental trauma, root canal procedure, increasing age (normal wear and tear of the enamel), genetic predisposition (thin, translucent enamel revealing the natural yellow color of dentin)), overuse of mouthwashes containing containing chlorhexidine and cetylpyridinium chloride, etc. may cause the same.

Consumption of certain foods such as citrus fruits, beets, curry, tomato sauce, soy sauce, balsamic vinegar, popsicles, and beverages like colas and even sports drinks that have a high acid content contribute in causing yellow this.

Besides, yellow or brown spots on teeth may be a symptom of an underlying condition like celiac disease, especially in children.

Intake of certain medications like antipsychotic drugs, antihistamines, antihypertensives, and some antibiotics can cause teeth discoloration. Chemotherapy sessions for head or neck cancers can also cause yellow teeth.

How to Get Rid of Yellow Teeth


Here are 8 ways to reduce teeth discoloration and help your pearly whites dazzle.
  • Baking Soda
  • Hydrogen Peroxide
  • Strawberries
  • Chewing Gums with Xylitol
  • Orange Peel
  • Kaolin Clay
  • Oil Pulling
  • Professional Tooth Whitening

Prepare a paste of half a teaspoon baking soda, half a teaspoon table salt, and a little water. Scrub this paste on your teeth as natural toothpaste to reduce the yellow discoloration on your teeth by getting rid of the stains. Follow this remedy about once or twice weekly. Besides, you can brush your teeth occasionally with a mixture of baking soda and lemon juice. Do not rely heavily on baking soda, though as it can damage the enamel over a period of time.

Mix together one teaspoon each of 3% hydrogen peroxide, baking soda and sufficient water to form a paste. Use this mixture a couple of times in a week instead of your regular toothpaste to get rid of yellow teeth and brighten your smile. Besides, you can create a homemade teeth whitening mouthwash by mixing equal amounts of hydrogen peroxide and water. You can also use peroxide-based tooth whitening strips.

Strawberries have been known to possess tooth whitening properties as it contains malic acid that works as natural bleach. So, eat strawberries to whiten your teeth safely and naturally. In addition, you can blend a strawberry in a blender to get a paste and rub it on your teeth. Rinse it off, and preferably, brush your teeth with a toothbrush to remove the fruit from your teeth because it contains sugars and acids.
 Eating spinach, broccoli and other dark green vegetables are also beneficial for yellow teeth as the minerals present in these foods form a film on the teeth that prevent staining.

Xylitol is a type of sugar alcohol which is used as a sugar substitute. It neutralizes the pH in your mouth and fights tooth decay. Moreover, chewing gum stimulates saliva which itself contains certain components that avoid tooth discoloration and cavities. Thus, you can have sugar-free chewing gums containing xylitol.

Scrub the inside of an orange peel or lemon peel on yellow teeth daily for at least a week to reduce the discoloration. The peels of these citrus fruits have bleaching properties. In addition, you can rub orange juice mixed with a little common salt.

Kaolin clay, also known as white clay or white dirt, works as a natural teeth whitening agent. Just dampen your toothbrush, dip it in this clay and brush your teeth. Use this method once a week. Do not overdo it.

You can get sparkling white teeth and eliminate the yellow stains through an easy Ayurvedic therapy called oil pulling. To follow this therapy, you need to swish a teaspoon of oil in your mouth for 15-20 minutes until it becomes foamy and then spit it out (do not gargle or swallow). Finally, rinse your mouth a few times and brush your teeth. You are required to use unrefined cold pressed oil such as sunflower oil for this purpose. You may also use sesame oil, coconut oil, or olive oil. Apart from cleaning your mouth, oil pulling stimulates the immune system and detoxifies your body.

Severely stained and discolored teeth can be treated with professional tooth whitening procedures like laser teeth whitening, professional bleaching, etc. Besides, dental veneers can help enhance the appearance of your teeth. Before going for any of these options though, make sure you research there pros and cons carefully. Certain stains, for example, are resistant to in-office whitening.

Tips to Prevent Yellow Teeth

Follow a good oral care routine by brushing and flossing your teeth daily. Plus, rinse your mouth after every taking a meal or even a beverage. Adopt proper brushing and flossing techniques. Check out this video explaining how to brush and floss your teeth properly.

Cut back on smoking and limit your intake of tea, coffee, and other staining foods and beverages. On the other hand, drink plenty of water. In fact, when you drink water after eating something, especially a stain-causing food, swish the water in your mouth before swallowing it.

Consume dairy products like milk, yogurt, and cheese as they contain calcium and phosphorus that help maintain healthy teeth and bones. Furthermore, a type of protein called casein present in these items strengthens the tooth enamel. Cheese, in particular, avoids tooth decay and facilitates in enamel re-mineralization.

How to Get Rid of Frizzy Hair

Having dull, frizzy hair is quite a common problem in those with coarse and curly hair. Hot and humid weather contributes in causing the same.

Besides, factors like excessive dryness, use of chemicals, heat treatment, and environmental factors may also cause this problem.

Basically, it happens when the outermost layer of the hair, that is, the cuticle becomes rough and porous due to these factors.

Thus, it absorbs more moisture from the air and allows it to penetrate to the middle layer (cortex). It results in uneven swelling, thereby making your hair appear frizzy.

Use of heating tools such as curling irons, flat irons, rollers, even blow dryers tends to make your hair dry and brittle over time. Hence, apart from causing frizzy hair, it makes your hair susceptible to breakage.

In addition, exposure to sunlight, harsh chemicals, windy weather, and habits like rubbing your hair vigorously after washing make your hair dry, frizzy, and prone to static cling.

How to Get Rid of Frizzy Hair

Here are 9 tips and tricks to help your battle with frizzy hair.
  • Natural Oils
  • Safflower Oil
  • Egg Yolk
  • Mayonnaise and Avocado Hair Mask
  • Aloe Vera and Coconut Oil
  • Beer
  • Dryer Sheet
  • Regular Moisturizer
  • Detangling Spray
Massage your hair and scalp with natural oils like olive oil and coconut oil (preferably slightly heated in a microwave or double boiler) to tame the frizz. Leave the oil on your hair for at least 45 minutes before washing it off. You can follow this treatment about once a week. Apart from moisturizing, it shall nourish your lustrous locks and promote hair growth, too.


After styling your hair, rub two to three drops of safflower oil between your palms and run your fingers through your hair, especially the ends to eliminate the frizz. Argan oil can also be used in the same way.

Whisk two egg yolks and apply the mixture on your hair about 30-45 minutes before washing your hair. It provides protein and moisture to your hair and hence, helps manage frizzy hair naturally.

Scoop out the pulp of half an avocado, mash it and add one cup of mayonnaise in it. Apply this smooth mayonnaise and avocado mask on your hair and wash it off after 20-30 minutes to get rid of frizzy hair. Use this hair mask about once a week. You can prepare another deep conditioning hair mask by mixing one egg, and a quarter cup each of olive oil and mayonnaise.

Mix a quarter cup each of aloe vera gel and coconut oil. Heat the mixture in a microwave for about 20 seconds to melt the oil. To mix both the ingredients well, you can put them in a blender and run it. Finally, apply it on your hair and leave it for about 15-20 minutes before washing your hair. Apart from removing the frizzes, it shall help restore your hair’s sheen and eliminate dandruff. Besides, you can prepare a hydrating hair spray for frizzy hair by mixing half a cup each of aloe vera gel and distilled water.

Replenish moisture in your hair by rinsing your tresses with a can of flat beer, from the roots to the ends. Let it sit in your hair for a couple of minutes. Finally, rinse your hair with cool water. Beer is often used as a natural hair conditioner because it is rich in proteins. Moreover, it adds volume to your hair, and makes them shiny and smooth. You can also combine equal parts of beer and apple cider vinegar. Mix one tablespoon of this mixture in a pint of water and use it as a last rinse. It shall help detangle your hair and reduce flyaways.

Running a dryer sheet over your hair can prove useful in managing frizzy, flyaway hair caused by static in the air. You may rub a dryer sheet on your comb and brush as well.

Another easy and quick fix for dry, frizzy hair involves the use of a regular moisturizer. You can take a small amount of the moisturizer in your palms and apply it on your hair. On the downside, it is likely to weigh down your hair and make them appear oily.

Spray a little children’s detangling spray in your palms and run it through your hair to get rid of the frizz without making your hair oily and limp. Besides, you can choose from a variety of commercially available anti-frizz products like serums.

Tips to Prevent Frizzy Hair

To avoid frizzy hair, deep condition your hair on a regular basis and prefer to use a protein-based cream hair conditioner. When choosing hair care products, choose the ones that can add moisture to your hair.

Avoid brushing dry hair as it can cause damage to the hair cuticle. Rather, you can wet and finger-comb your hair to remove the knots and tangles.

While blow-drying your hair, use the dryer only around the roots, not the hair shaft and tip. After blow drying your hair, hit the cool shot button to apply cool air that smoothens the cuticles and eliminates the frizz.

Protect your lustrous locks from exposure to the sun and wind.
Take a proper diet rich in protein and essential vitamins and minerals to maintain healthy hair. Strands of coarse hair, in particular require protein. Thus, you can also apply protein-rich hair masks to prevent frizzy hair and reduce split ends, too.

How to Get Rid of Whiteheads

Whiteheads are small white bumps caused by clogged skin pores. Thus, they are similar to blackheads. However, unlike blackheads they appear white or yellow in color.

The reason is that the sebum, dirt, dead skin cells, etc. trapped in the skin pores do not get exposed to the oxygen in the air as the follicles have narrow opening to the skin surface.

In case of blackheads, though, the follicles have a wider opening, thereby allowing air to enter follicles. Hence, the plugged material turns dark in color due to oxidization of melanin.

A whitehead, also known as a closed comedone or milium (plural milia), is a form of acne. It is usually painless but can be infected with P.acnes bacteria. More often than not, whiteheads appear on the face, particularly on cheeks temples, and forehead.

Some people are more prone to blackheads and whiteheads than others because their sebaceous glands produce sebum with oleic acid rather than linoleic acid which is calming to the skin and does not lead to the development of hard plugs.

How to Get Rid of Whiteheads


Here are 10 suggestions to help clear whiteheads.
  • Facial Steaming
  • Baking Soda Deep Pore Cleanser
  • Milk and Lemon Juice
  • Tea Tree Oil
  • Cornstarch and Vinegar
  • Almond and Honey Face Scrub
  • Oatmeal Mask
  • Deep Pore Cleansing Strips
  • Benzoyl Peroxide
  • Extraction
Facial steaming can be done about once a week to open up your pores and loosen up the buildup of oil, dirt, and dead skin cells. For this, you need to boil a pan of water and pour it in a large bowl. Put a few drops of an essential oil like that of lemon, chamomile, rosemary, etc. in it and place your face over the bowl to expose it to the steam for 5-10 minutes.
 Alternatively, you can dip a towel in warm water, wring it, and then place it on your face for a few minutes and repeat the procedure two to three times. After this steam treatment, you may soak a cotton ball in apple cider vinegar and apply it on the affected areas.

Add four tablespoons of baking soda in a cup of warm mineral water. Apply this mixture on your face and leave it for about 10 minutes. Finally, remove the mask and follow up with a moisturizer. Preferably, follow this remedy after facial steaming.

Mix one tablespoon each of lemon juice and salt (preferably dead salt) in two tablespoons of whole milk. Rub this recipe on your face. Rinse it off after 15 minutes to reduce whiteheads. Regular application of this milk and lemon juice face pack can also nourish and soften your skin.

Soak some tea tree oil on a cotton ball and dab on the affected area to fight bacteria and cure blackheads, whiteheads, and acne breakouts. It helps reduce acne scars, too.

Take cornstarch (absorbs oil) and apple cider vinegar (works as an astringent) in a ratio of 3:1. Mix both the ingredients in a bowl and apply the resultant paste on the affected area for about 15-30 minutes. Finally, wipe it off with a clean washcloth and wash your face with lukewarm water, followed by a cold water rinse to close the pores.

Grind a handful of blanched almonds. Take two tablespoons of this paste and a tablespoon of pure honey (preferably manuka honey) and a little lemon juice. Exfoliate your skin with this almond and honey facial scrub and wash it off after 15-20 minutes.

Add a tablespoon of honey in two tablespoons of oatmeal. Heat the mixture slightly in a microwave. Apply it on your face and after 20 minutes, remove it with lukewarm water to clear blocked pores. Instead of honey, you can combine oatmeal with plain yogurt, too. After exfoliation, wrap an ice cube in a piece of cotton cloth and run it over your face. It helps close the pores.

Regularly apply a cleanser, followed by deep cleansing pore strips to reduce whiteheads by pulling away the buildup dirt and sebum. It can help treat mild acne as well. Plus, you may use facial cleansers containing alpha hydroxyl acids and salicylic acid.

Application of an over-the-counter treatment containing at least 5% benzoyl peroxide inhibits acne growth by killing the bacteria and exfoliates dead skin. Thus, it is often recommended for healing whiteheads. After applying this remedy, though, make sure moisturize your face lightly as benzoyl peroxide tends to dry out your skin. Follow this treatment two times in a day for about four to six weeks. Antibiotics are used at times, but most antibiotics are not effective in preventing as well as curing whiteheads.

There is also the option to consult a dermatologist or skin care specialist and get your whiteheads extracted by an expert. An instrument called whitehead extractor is used for this purpose.

Tips to Prevent Whiteheads

When dealing with whiteheads, blackheads, pimples, etc. it is advised to avoid using greasy makeup and skin care products. So, you should opt for water-based, non-comedogenic products.

Consistent cleaning of the skin is extremely important for preventing and controlling problems like acne, whiteheads, and blackheads in oily skin. Therefore, wash your face two times in a day with a soap-free face wash.

Apple Cider Vinegar Mole Removal

Since time immemorial Apple Cider Vinegar or ACV has been used as one of the most effective treatments for moles and warts. It works effectively in the treatment of skin growths. ACV has been used not only for the treatment of moles but has also been used as a weight loss solution.
This particular vinegar is actually a sour tasting ingredient that is specifically meant for kitchen purposes. Some people experimented with ACV for the treatment of moles and found the result to be unbelievably effective. 

Generally there are three types of mole removal methods namely, surgical methods, over the counter medicines and mole removal home remedies. Depending on the size of the mole, its color and the danger it poses to your health, the dermatologist will tell you which one would be the best treatment. And yes it is essential to discuss about it with your doctor before you take up any type of treatment. 


For the Apple Cider Vinegar mole removal you need the following things:

  • Apple cider vinegar
  •  Cotton balls
  •  Band aid strip
Take a cotton ball and soak it in the apple cider vinegar. Then place the soaked cotton on top of the mole and put the band aid strip on it, to keep it sticking for longer period. Repeat this process atleast three times a day. Replace it with new cotton balls soaked in vinegar. Those who wish to remove protruding moles must see the result after two weeks. It acts fast and makes the mole shrink, reducing its size and finally layering it off the skin.

ACV may also have certain side effects as it is acidic in nature. If proper care is not taken while applying, it may burn the surrounding skin and may lead to the formation of dark spots. So make sure to apply an ample amount of Vaseline on the skin around the moles before you dab the vinegar soaked cotton on the moles. This will prevent the vinegar from spreading to the skin. 

A number of people have tried the apple cider vinegar treatment for mole removal. Majority of them found the ACV treatment effective whereas a handful of them claim that the treatment did remove the moles but it came back after a couple of weeks. 

However, apple cider vinegar does not prove effective to all the people. Different people have different skin types which react differently. Yet people should not believe the statement that, ‘all sorts of home remedies for mole removal may not work’. But always make sure to consult your dermatologist before you go in for any home remedy for the removal of moles.  

Apple cider vinegar cannot always help with the removal of moles. There are certain limitations. For instance, if the mole has turned to melanoma then it needs to be removed from the underlying cells. Confirm the size of the tumor through a biopsy test. Yet removal of the mole cannot assure you that the mole will not recur. While going out always protect your skin from excessive exposure to sunlight to prevent moles and melanoma from growing back to your skin.

Also, you should be well aware of the warning signs of melanoma (cancerous moles) for early diagnosis, so that proper treatment could be considered as early as possible.

Natural Remedies For Arthritis

Arthritis, the term itself is very scary as the pain. Arthritis is “joint inflammation” and any part of the body can be affected by it.Arthritis generally causes damage to the joints and generally occurs in arms, hands and the legs. Swelling, restricted movements and pain are the general result of the inflammation.

The cause of the pain varies from individual and could be any reason. The most common reasons for suffering from Arthritis are obesity, bone infection, hereditary factors, physical exertion, hormonal imbalance, ageing and various such factors.


Look Before You Eat

One must have strict eating guidelines to get relief from the pain caused by Arthritis. Fried foods, dairy products, preservatives and additives, meat, cakes and chocolates are a complete “say no” foods. One must stay away from them and should not consume.

Almonds, Apples, Asparagus, Avocado, Banana, Beetroot, Blueberries, Broccoli,Button mushrooms, Carrots, Cauliflower, Ginger, Green vegetables should be consumed in larger quantity. Onion, Oranges, Papaya, Peach, Pineapple, Spinach, Sweet corn, Turmeric and Whole or cracked grains are very good for treating arthritis.

Natural Remedies At Its Best

There is no better way than massage to get relief from Arthritis. Regular massaging with olive oil at the affected areas gives a fantastic result.Though it is not a permanent cure, it provides the best form of temporary relief.

Regular usage reduces the pain too. Drinking fresh juice of potato when taken with same amount of water proves to be a soothing cure of the problem. Rubbing the painful areas of joints with hot vinegar at nighttime is been said to give relief from the pain.

Another tried and tested cure is to take camphor and place it in a glass bottle with mustard oil in 1:10 ratio. Place this bottle in sun to allow the camphor to dissolve completely by heat of the sun.

Regular gentle massage of this oil on joints is a great natural remedy for joints. The age-old method of drinking water kept in copper utensil for overnight is a great remedy.

The water is capable of accumulating traces of copper resulting in strong muscular system. Eating raw garlic is considered another effective cure for painful Arthritis. If one can swallow the single pod as a whole, early in the morning at empty stomach is fine.The patient with severe pain of Arthritis can be put on diet of bananas only.

As bananas are rich in vitamin B6, are very effective source for treating Arthritis. A tsp of Black sesame seed is to be soaked in a half cup of water and kept for whole night. Drink this water empty stomach in the morning to get the best result. Soup of green gram with crushed garlic is an effective remedy used for ages.

One must understand that each natural remedy for Arthritis works in different pace for different person.Age, severity, other physical and health problems affect the treatment. You should avoid the actions which cause more pain. You can even consult your orthopedic for the cure. It is never late to start any natural remedy for Arthritis.

Canker Sores - Causes Symptoms and Treatment

Canker sores are also called aphthous (af-thus) ulcers. They are sores inside the mouth. You may have canker sores on the inside of your lips and cheeks, or on your gums or tongue. It is common to have more than one. They are painful but are not harmful. Usually, canker sores heal in 2 weeks. You may get them more than once.

Causes of Canker Sores


Doctors don't know exactly what causes canker sores. They may be hereditary, but doctors have not figured out exactly how people inherit the tendency to get them. Researchers think they may be an overreaction to the Streptococcus bacteria, because the bacteria are often found in the canker sore. People with canker sores often have small injuries from dental injections and toothbrushes in the lining of the mouth. Allergies, such as hay fever, are also associated with an increased risk for canker sores.

Canker sores often occur near the time of a menstrual period. They may also be brought on by stress - for example, many students get them during exams. Other possible causes include lack of cyanocobalamin (vitamin B12), folic acid, or iron. Certain foods may be triggers for canker sores or act as nutrients for the Streptococcus bacteria.

Canker Sore Symptoms

Canker sores occur in several forms. They can involve any area of the mouth except for the gums, lips, and hard palate.

Minor canker sores (which account for the majority of aphthous ulcers) are oval and less than 10 mm (1/3 inch) across. Most are 2-3 mm with a white center. They are painful but clear up within three to 14 days without scarring. It is unusual for them to become infected.

Major canker sores consist of deep ulcers measuring greater than 1 cm (1/3 inch). These ulcers, which are very painful, have irregular margins and often last for three to six weeks. They tend to heal with extensive scarring.

If you feel a burning or tingling sensation inside your mouth, canker sore might appear afterwards. It will start with a small whitish sore somewhat like a wound with red edges around it. Either it will appear under your tongue, inside your cheeks or on your tongue, canker sore starts with the same sensation and appearance. Other symptoms like swelling of lymph nodes, fever and listlessness could also be experienced though not related to canker sore.

Treatment of Canker Sores

Nutritional supplements. Your doctor is likely to prescribe a nutritional supplement if you're low in important nutrients, such as folate (folic acid), vitamins B-6, B-12 and zinc.

Pain from a canker sore generally lessens in a few days and the sores usually heal without treatment in about a week or two.

Avoid hot and spicy foods and foods with sharp crunchy edges, such as nacho chips, which can poke into the canker sore.

Topical pastes. Over-the-counter and prescription pastes such as Orabase, triamcinolone acetonide (Kenalog in Orabase), amlexanox (Aphthasol) and fluocinonide (Lidex) can help relieve pain and speed healing if applied to individual lesions as soon as they appear.

Effective Exercise For Big Thighs

The human body comprises of various body parts. Most of the people are very well aware of the fact that most of these limbs are highly useful for the entire body. These limbs are assigned with separate tasks and that is why they are responsible for their own tasks only. As a matter of fact, most of these limbs are highly useful for the smooth functioning of the human body. As far as the motion in the body is concerned, it is a very important task that every human body is supposed to do with more strength.

The strength is provided by the muscles of the body. These body muscles form the muscular system inside the body and quite naturally, these muscles are required to get more strength. These muscles are available in all the body parts and these get the required amount of strength by dint of various types of foods and other ingredients that are required by each and every body. The thigh muscles are probably the most important body parts which are responsible for motion in the human body. These muscles are required to be very strong so that they can take up greater amount of responsibility whenever the body needs.

The thigh muscles are also the thickest muscles in the body and that is why these must get the adequate amount of care so that they get stronger and stronger in the due course of time. People must take up some extra responsibility to take care of these muscles. As far as the necessary measures to build these muscles stronger, people must take the advice of the specialist people who have the required amount of experience in this field.

Generally, the various measures that are adopted by various people all around the world are not planned in the proper manner and that is why they concentrate on getting the muscles of the upper half of the body stronger. These exercises are not scientific and that is why these exercises do not take care of the proper growth of the thigh muscles.

If you are interested in getting better knowledge of getting thicker and stronger thigh muscles, then you have landed at the most appropriate part of the Internet. This piece of information can certainly help to get best thigh exercises. These exercises are developed by the professional health experts and body building experts and their combined advice is certainly capable of giving you the best idea of building these thigh muscles stronger and more efficient.

The following set of exercises can be the best as well as the most effective thigh exercises for you:

Exercise Tips For Big Thighs


Squats
  • If you are seriously interested in getting stronger thighs, then squats are probably the best set of exercises that you can do on a regular basis. The squat exercises are slightly technical by nature and that is why it is always good to do these set of exercises in the presence of an expert physical trainer. You can get these expert trainers in most of the gyms which may be available in your local areas as well.
  • These squat exercises can make your muscles attractive as well as strong and you will be able to notice the positive change in your thighs within a few weeks. Your thighs will certainly appear more solid and attractive. At the same time, you can also find a natural strength in your body as these squat exercises provide sufficient amount of exercise to your body.
The Leg Workout

As your thighs are the inseparable parts of your legs, so it is necessary for you to provide sufficient amount of exercise to the leg muscles as well. There are various types of exercises that can provide sufficient amount of exercise to both your feet. Leg extension exercises, leg curl exercises and leg press exercises are the most popular leg exercises that can make the muscles of your legs sufficient amount of exercise. This certainly helps you to get sufficient workout to the thigh muscles as well.

Leg Curl Exercise

You can certainly realize that the more work you do to get natural strength to your body, the stronger it will become.  However, it is worth mentioning that most of these leg exercises must be done in the presence of the physical trainers. It is highly advisable for all that they must keep themselves in closer contact with these specialist people who can look after you at the time of needs.

The Rising Importance Of Gyms
  • Joining a gymnasium can be a fantastic idea to get stronger and attractive muscles. As a standard gym is facilitated with various equipments and monitoring devices so the measures for solid and stronger thigh muscles cannot be problem for anyone. Moreover, most of the gyms also provide specialized facilities in the form of various exercises.
  • These days, joining a gym has become type of passion among the people of the world. These sets of exercises are highly productive and that is why riding a treadmill can be highly important for the local health authorities.
Need Of Balanced Diet

Before starting any measures for getting stronger and well-formed thighs, you must understand the need of balanced diet in your day-to-day life. The term “balanced diet” stands for the food that contains all the important ingredients in the most appropriate manner and ratio. It is good to remember that you must not eat too much and you must maintain a record of the students who have made the payment.

Balanced Diet

It is good and safe for the most of the people to make a diet chart for the different food items in the most appropriate ratio. You must remember that the road owners as well as the owners of these vehicles never participate in the classes in any form. These best thigh exercises have proven track record and you must be another client who is also largely benefitted to most of the users. It is good to remember that all the above mentioned exercises are extremely good and result oriented. These have been tested continuously by the various people who share the urgent needs of getting stronger and solid thighs.

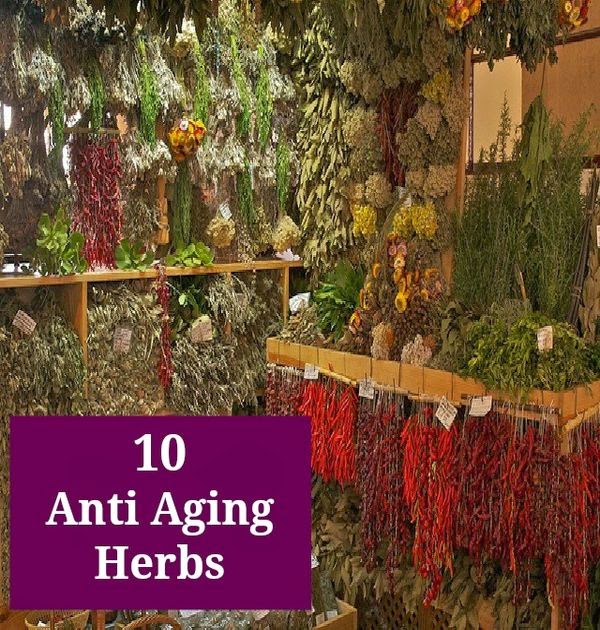
10 Anti Aging Herbs

Herbs have proved to be very effective for many reasons. The best part about herbal treatments is that they have fewer side effects and are economical. The healing properties present in plants act as an active source of curing diseases. They have been used to remedy various ailments from common cold to psoriasis to cancer. Anti-aging herbs are used to slow down the aging process. Most of them have a spirit lifting and mind strengthening qualities. They resist stress on body and mind and have a deep influence on the skin. They are used in different forms like medicines, oils, soap bars, ointments, creams and gels. Given here are a few anti-aging herbs that can be handy to you.

Herbs For Anti-Aging


Ginseng
Ginseng is a perennial herb that reduces the aging process to slow down to a certain extent. Main benefits of ginseng are it relaxes and reduces the effect of stress, stimulates both physical and mental activities, strengthens and protects during any severe physical strain.

Rhodiola Rosea
Rhodiola Rosea is used by cosmonauts, soldiers, sportsmen and ageing persons as an effective anti-aging medicine. The herb increases energy level, stimulates immune system, raises resistance power of body against toxins, breaks down the stored fat in the body and increases mental and physical performance. It has anti stress properties and anti-aging phyto-supplement.

Gynostemma Pentaphyllum (Jiao gu lan)
Jiao gu lan has ingredients similar to ginseng but has three times the properties than ginseng. The herb has an overall effect in helping to balance and regulate body systems. It normalizes cardiovascular and hormonal systems.

Ashwagandha
Ashwagandha is a traditional Indian medicine that has anti-anxiety and anti-depression effects. It strengthens the immune system, relieves stress, amnesia, fever, viral infections, and stimulates the growth of axons and dendrites.

MACA
MACA is an herb that increases fertility. It is used to boost youth, increase energy level and has sex enhancing ability.

Grape Seeds Extract
Grape seed extract is a nutrient derived from the seeds of grapes and is a rich source of antioxidant and collagen-protective pigments. The seed extract protect the body from premature aging, decay and disease. It is valuable in the treatment of inadequate blood flow in the capillaries and veins.  

Ginkgo (Ginkgo Biloba)
Ginkgo reduces the risk of strokes, repairs damaged nervous tissues, and increases mental acuity. The herb is also known for its ability to improve short-term memory.

Gotu Kola (Centella Asiatica)
Another herb associated with anti-aging is gotu kola. It is a rejuvenating herb for nerve and brain cells, increases intelligence and memory while retarding senility and aging. Studies reveal that gotu kola helps in overcoming stress and fatigue.

Bilberry and Blueberry
Bilberry and blueberry combat the free radical damage that occurs in the eyes. They are said to help keep the brains young. They also reduce inflammation, hypertension and allergies.

Soy and Red Clover
Soy and red clover contain phytoestrogen, a compound that mimics the body’s own estrogen. This compound protects the body from many-age related diseases and lessens the problems with menopause. Soy reduces the occurrence of breast, uterine and ovarian cancer. Red clover reduces hot flashes and night sweats.

How To Stop Hiccups

Hiccups occur at rhythmic intervals of about a few seconds apart and bouts don't usually last for more than an hour.

One of the main reasons for hiccups is when the vague nerve or also known as the pneumogastric nerve or cranial nerve x or any of its branches gets irritated. The vague nerve starts in the brain stem and runs through the throat, esophagus, lungs, heart and diaphragm and into the abdomen. The vague nerve has many important functions and among them are to regulate the heart beat, keep the digestive tract in order and send messages to the brain.

Several triggers can cause the nerve to get irritated. When it does, an involuntary contraction of the diaphragm occurs followed by closure of the vocal chords. This causes the hiccup. The triggers include eating too fast and not chewing food properly which causes air to get entrapped. Overeating, eating spicy foods and drinking too much can also upset your digestive system and lead to hiccups.

Hold Your Breath

First of all, take three deep breaths. Breathe in through your nose from your stomach and release it slowly through your mouth. On the third deep breath, hold it as long as you can before you release. While you are holding your breath, pinch or hold your nose and close your mouth so that the air won't escape. Repeat the exercise several times and you should be able to get rid of the hiccups.


How To Stop Hiccups - Try the Sugar Remedy

Place a teaspoon of sugar at the back of your tongue and swallow it. Quite a number of experts recommend this hiccup remedy. The sugar will overload the nerve endings in the mouth, the nerve impulses receive a new message and the brain will shut off the hiccups.

Drink Water

A popular home remedy for hiccups is to drink water. The act of swallowing the water will interrupt the cycle. What you may also want to try to is to put water inside your mouth, bend sideways or forward and then swallow the water. Gargling ice water may also help in getting rid of hiccups.

How To Stop Hiccups - Breathe into a Paper Bag

One of the ways to stop hiccups is by inhaling and exhaling into a brown paper bag making sure that the bag is held tightly around your mouth so that no air can escape. The logic behind this hiccup remedy is that the hiccups occur because of a decrease in the amount of carbon dioxide in the bloodstream. So when you breathe out into the bag, the carbon dioxide is trapped inside. And when you breathe in, you are breathing the carbon dioxide back into your body and increasing its amount in the bloodstream.

Ways to Get Rid of Age Spots

Check out our list of popular and natural remedies to get rid of age spots. Find out what the causes and treatment options are for these common discolored skin spots.

Age spots are the flat, brown or black skin spots that are a common appearance on the arms, back and face of people who are over the age of 40. This is probably why it's called age spots. Light skin people are at a higher risk of developing age spots. Younger people may also develop liver spots due to heredity. 

Regular use of tanning lamps or tanning beds may also cause age spots.

Age spots or liver spots and known medically as solar lentigines are signs that the skin was once regularly exposed to the sun without skin protection. Even though it is also called liver spots, it has nothing to do with the liver or liver disease. Age spots are caused by over production of melanin or the pigment in the epidermis when the skin is exposed to the sun. It does this to protect the deeper layers of the skin and after some time, the pigmentation will gradually show up.


These skin spots are harmless and aren't painful. But they do affect appearance especially when they show up on the face. You need only be concerned if the skin spots show rapid changes in size, have unusual or uneven color and are irregular in shape because those are the early signs of melanoma or skin cancer.

Cosmetic treatments to remove age spots include chemical peel, dermabrasion, freezing and laser therapy. Cheaper methods to get rid of age spots include the use of over the counter bleaching cream and natural remedies such as herbal extracts that contain glycolic acid, hydroquinone and salicylic acid. Using home remedies to get rid of age spots requires consistent application and will take a long time to fade compared to cosmetic treatments.

On top of the list of natural remedies to get rid of age spots is uva ursi or bearberry which is the leaf extract of uva ursi shrubs. Scientific studies found that uva ursi contains hydroquinone. Many bleaching cream use 2% of it as an ingredient because it is believed that hydroquinone is effective in fading aging spots, even skin tone and reduces the overproduction of melanin. 

Glycolic acid gel peel and glycolic cream are two of the popular home treatments to get rid of age spots as well as improving fine lines and wrinkles and acne. Some species of sugar cane contains this acid and this is one of the reasons why some people use white cane sugar blended with lemon juice and avocado oil or aloe vera gel for liver spots removal.

When glycolic acid is applied on the skin, it will penetrate deep inside and will stimulate collagen formation. This will result in the fading of discoloration and even skin tone. 

Researchers discovered that the active ingredient called sterolins in avocado oil has the potential to reduce age spots and maintain the moisture of the skin. Avocado oil has the ability to improve collagen production and this is especially helpful for aging skin. 

Castor oil which is the extract from castor beans is another alternative that you can use to get rid of age spots. This herbal extract has many healing properties and is used as treatment for various conditions and diseases.
If you are taking birth control pills, try to stop using it and notice if it helps remove the liver spots.

To prevent age spots or its reappearance once you have them removed, avoid direct UV ray especially between 10am to 4 pm. If you must go out, protect your skin by applying sunscreen with SPF 30. And try to wear clothes that protect your skin especially your arms, back and legs.

Indoor Workouts for Women

Indoor exercises are those which are done in the confines of a room in your home and some people might even consider indoor exercising as going to a gym. Either way, you need to keep your metabolism rate up by working some of that fat off your body. The advantages of indoor exercises are that you don’t need too much time, space and facilities to carry it out; there is no requirement for a gym membership or any fancy equipment. It’s probably time to keep your New Year resolutions in shape too and start working on that flab instantly! Read more to find out the best indoor exercises for your body type.

Indoor Workouts

Squats

You need
  • very little space and, if you can invest, a pair of dumbbells – heavy or light depending on the intensity with which you want to keep going (even without dumbbells the exercise can be done).
  • Keep your feet slightly apart and bend your legs at the knees, keeping your back straight at all times. Try and push your buttocks out to achieve this.
  • The lower you can sit and stand, the better the exercise is.
  • Do about 20 reps of two times.
  • If you are using the dumbbells, then hold them out in front of you (at an arm’s distance away from your body).

Flexibility Exercises

You need: 
  • A considerable amount of space to move your arms around.
  • Stand with your feet together, slowly circle your arms so that you stretch your upper body.
  • Do this about 5 times with both arms.
  • Then, sit down and extend your knees out straight. Pump your ankles up and down to stretch the leg muscles out too.
  • This exercise reduces the excess fat on both your arms and legs.
Jumps
  • You need to be careful of the ceiling for this particular exercise! Also, it warms the body up tremendously (for those living in cold conditions).
  • All you have to do is jump as high as you can. But, if you aren’t used to working out regularly, then you can start slow and low.
  • Beginners can do about 20 jumps and can slowly move onto about 50 jumping jacks. Do about 2-3 sets each time for breathers.
  • This calls for a solid weight loss and toning of the leg muscles too.
Yoga
  • You need a mat to lie on and immense patience! It is an unconventional way to lose weight.
  • The goodness of power yoga is that it quiets your mind, limbers your body and energizes you to the maximum.
  • For example. Take a mat and lie down. Slowly breathe in and out. As you are breathing in, push your stomach out and as you are breathing out, pull the same in. Continue this slowly for about 10 times.
  • It is an excellent way to lose tummy fat and it includes a good breathing technique.
These are a few indoor exercises you could use to shape your body in an efficient and easy manner! Hope this non-gymming, indoor regime does some good.

Facial Exercises For Sagging Neck

Neck is an extension of your face and possibly the first part to show up ageing on the skin. You spend hours on taking care of your face, grooming and massaging it with costly creams and facials, but mostly ignore the neck. A famous Holywood actor Clint Eastwood in his recent movie looked great, though he is almost in his eighties. However, what you could not ignore in that movie was his neck, which had a slight gorge it. The kind of physique and health this actor sported is inspirational for older generation, but a small gobble was looking a little unattractive. Although this is not a cause of concern, but it could make you think of how you can prevent that sagging effect of the skin as you grow old. Sagging neck is a part of ageing up process. 

As you grow old, the skin tends to loose its elasticity, and results in drooping skin. The neck is considered to be thin-skinned with nerve attachments. You cannot overturn the process of ageing and elasticity of the skin, but with some exercises, you can firm up the neck and its muscles. This will make the sagging of the neck less visible. Be particularly careful with your neck exercises as it can cause pain in your upper and lower back of the shoulders. You can have a trim and flawless neck with the help of some easy neck exercises. Read the article for few simple and helpful exercises.  

Exercises For Sagging Neck

Many people have a habit of keeping the chin folded downwards touching your chest or lying in an uncomfortable position for longer periods. This can result in developing fine lines and a sagging neck. One of the best and simple exercises for neck is holding your chin high and keeping it straight for a perfect neck.

Massaging your neck once in a week is a good exercise. When you take care of your face, take care of your neck also. As you apply mask on your face, do this for your neck too. This will keep your face and neck look equally good and healthy.  


Stretching and straining your neck in upward and downward directions can strengthen your neck muscles and give them a young and supple look. So strength training is good not just for your other parts of the body but also your neck.

To keep your neck supple and flexible, stretch your neck every day by doing this easy exercise. Bend your head to one side of the neck , hold it for 30 seconds and then bend it on the other side and repeat the exercise for three times at a stretch. You can do this exercise while sitting or standing.

This neck exercise helps you to firm up the front part of the neck where the marks of ageing show up first. You can do this exercise in the standing or sitting position. Bend you head back, and while doing this, push your tongue into the roof of your mouth. This helps in tightening up of the muscles at the front part of your neck. Now bring your chin downward towards the chest while still holding the tongue touching the roof of your mouth. This will tighten your skin underneath the chin and the front of your neck.

This is a simple and comfortable exercise of the neck. You can do this while lying on the bed. This will firm up the front part of the neck area. You can lie down on the edge of the bed, and move your head up towards your body. Hold it for ten seconds and relax. Repeat this sequence for three times at a stretch.

Facial Exercises For Sagging Neck

Mouth Exercise For Neck

This exercise tightens the muscles in the neck. It is a simple exercise which can be done while sitting or watching television. Begin by looking at the ceiling and your chin positioned towards the television. Close your lips tightly and start chewing movements like when you chew a gum. Repeat this exercise for at least 20 times at a stretch and three times a day.

Chin Exercise For Neck

This exercise helps in strengthening the muscles underneath the chin. Stand in front of the mirror and stick out your chin as far as you can. When you protrude your chin, put pressure on the chin by squeezing it until it looks wrinkled and turns white. While doing this exercise your neck should feel the pull. Hold it for five seconds, and relax before you do it again. Do this for ten times at a stretch and repeat it for three times per day.

Lip Exercise For Neck

This lip exercise can extend your neck muscles to feel the stretch in the neck area. Make a pouting face by pulling your bottom lip upwards. While pouting your lips put the fingers on your collarbone and pull the skin down gently. This should make you feel a visible stretch in your neck area. This helps in tightening the muscles in the skin and the neck area, and makes the skin better.

Water Exercises For Arthritis

The only reason the body is able to move is because of joints. Joints provide flexibility to the rigid bone structure and the damage of even one joint can hamper the mobility of the body. The number of joints in the human body is between 250 and 350 and all these are susceptible to damage due to disease or other factors. The most common degradation to joints occurs due to the dreaded disease called arthritis. It can affect every age group but is more prevalent among the elderly and the middle-aged people. 

The most common symptoms of this disease are inflamed joints with extreme pain. Gradually the joints get deformed and the bones start degrading. As such, the most important function, mobility, is hampered. To prevent arthritis from reaching the extreme stage, doctors have recommended exercise to counter the wear and tear of the bones. These exercises must be especially designed considering the fragility of the joints. In this respect, water exercises for arthritis are a very good option. The buoyancy of the water presents minimal pressure and stress on the bones and so there are very less chances of injury. So you do not require any weights, even light ones as the normal resistance of the water can be used to create gentle pressure on the bones. Regular water exercises not only give relief from arthritis pain but also stops the disease from progressing further. Read below for more on arthritis water exercises.   

Water Exercises For Arthritis 


During arthritis the wrists, fingers, and toes gets deformed. The best water exercise for these is to submerge the entire body below the water except the head. Then stretch the arms in front of the body and keep the palms facing the ceiling. Next, turn the palm so that it faces the floor of the pool or tub. Slowly do this at least 10 times. Now, form a fist by curling the fingers and then open the palm. Do this for both the palms and at the same time.

To exercise the wrists, keep the arms stretched and bend it up and down. Do this exercise for 5 times.

To exercise the elbows, get into the water and submerge yourself till the neck and then stretch the arms in front of your body. Now bend the elbows and make the thumbs touch the shoulders. Then straighten the elbows again. This will strengthen the muscles of the elbows.

For the ankles, stand on your legs and raise the leg forward keeping the knees straight. Raise the leg for at least 30 degrees. Then bend the ankle up and down 8 to 10 times. Bring the leg down and repeat it for the other leg.

To exercise the hips stand in water that is up to your chest. Now bend on one side and maintain that position for few seconds. Stand upright and then bend on the other side and hold that position for few seconds. Stand upright and repeat the set for five times.

Another hip exercise is to stand upright and then hold the wall of the pool with one hand. Now, swing the leg that is opposite to the hand with which you are holding the wall. The leg must be swung in a backward and forward motion. After ten repetitions, move to the next leg.

Knees and ankles can be exercised by walking in the water. Walk by swinging your arms. Be careful that you don’t slip and fall. So, it is better to hold onto some support during walking. 

Additional Tips 
  • The water should not be very hot as the high temperature can be detrimental for the body.
  • Always keep someone near the pool to help you in case of any emergency.
  • Do not do this exercise on a full stomach.
  • Pregnant women should avoid these exercises. They should do so only under medical recommendation.
  • People who are suffering from heart diseases, high and low blood pressure and other serious diseases should also do these exercises after medical consultation.

SPONSERS